by admin admin No Comments

Iran, France Sign MoU to Produce Car Rubber Parts in Iran

Iran and France signed a memorandum of understanding on Tuesday to produce automotive rubber parts in Iran in an agreement that is set to turn domestic producers into parts suppliers for French carmakers.

The agreement was signed by Mehdi Nekoumanesh, head of Iran Polymer and Petrochemical Institute (IPPI), and the president of Union des Syndicats des PME du Caoutchouc et de la Plasturgie (UCAPLAST), Denis Vaillant, Shana News reported.

UCAPLAST is an independent employers’ organization which represents all small and medium-size French enterprises in the rubber and plastics industry.

The MoU calls for sharing expertise of UCAPLAST member companies with  Iranian manufacturers.

Affiliated to the Ministry of Science, IPPI oversees activities of 20 knowledge-based companies which produce rubber parts for automobiles.

The businesses are expected to sign an auto parts and supplies contract with the French automaker Citroen. The French company already has a joint production deal with Iran’s second-largest automaker SAIPA.

According to the deal, Citroen is required to export 30% of vehicles or auto parts manufactured under the JV through its international sales network.

The IPPI-UCAPLAST arrangement will enable local auto parts suppliers to make  products that meet Citroen standards.

The MoU was signed on the sidelines of 11th International Exhibition of Plastics, Rubber, Machinery, and Equipment (Iran Plast 2017) held Sept. 24-27 in Tehran.

 Easy Exports

For selling vehicles and components in the EU and countries under the United Nations Economic Commission for Europe Regulation 10, companies must have the E-mark certificates for their products.

However, according to the Head of the Bureau Veritas automotive department in Iran, Mehdi Parvini plastic automotive parts used in vehicles’ interior are exempted and do not need the certificates.

Obtaining E-mark certificates is an arduous and time-consuming exercise and seen as a hurdle to automotive exports from Iran. Therefore, it would be easier for Citroen and other French auto companies operating in Iran — namely Renault and Peugeot — to export plastic automotive parts produced in Iran through their international networks instead of exporting vehicles or engine parts.

Outdated technology used by Iran’s supply chain are seen as a hurdle in the way of expanding the local automotive industries and implementing local carmakers joint venture contracts with foreign firms.

Law stipulates that in all new agreements signed with foreign companies at least 40% of the vehicle parts should be manufactured in Iran. However, foreign carmakers are reluctant to comply for more reasons than one.

The IPPI-UCAPLAST deal should contribute to the implementation of the new JVs with foreign firms because plastic parts have an obvious share in the production of vehicles.

Source: https://financialtribune.com/articles/auto/73210/iran-france-sign-mou-to-produce-car-rubber-parts-in-iran

by admin admin No Comments

Pre-applied Butyl Sealant

Pre-applied Butyl Sealant

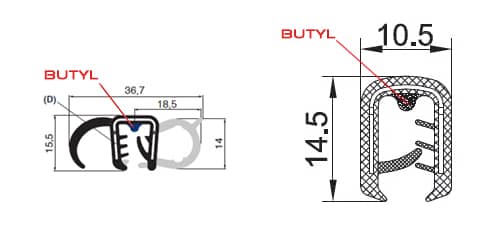
For better insulation properties, we can add / inject Butyl to trims, and seals such as door weatherstrips, trunk seals, trim seals, rubber edge trims, door sealings, edge protectors, edge protection sealing profiles can be provided with pre-applied butyl sealant at an additional cost to provide an improved grip and a positive seal with excellent heat reistance.

Keywords: rubber extrusions with injected butyl, rubber seals with butyl, rubber profiles with injected butyl, edge trims with butyl, butyl sealant, Butyl Injection, rubber edge trim with butyl adhesive

by admin admin No Comments

Cooper Standard opens new facility in Canada

SHERBROOKE, Quebec—Cooper Standard Automotive Inc. celebrated the grand opening of a new, 138,000-sq.-ft. site in Sherbrooke dedicated toward its Industrial Specialty Group.

The $10 million project consolidated three existing ISG facilities, bringing 250 employees under one roof. The site will produce extruded EPDM rubber sealing products for the non-automotive industrial, commercial and specialty vehicle markets. The site also will house a new enterprise resource planning system and provide employee skill enhancement programs.

North America President Bill Pumphrey said during a ribbon cutting ceremony on Sept. 21 that the $3.47 billion automotive supplier sees significant opportunities in the non-automotive sectors.

Sherbrooke Innopole worked closely with Cooper Standard during the completion of the project, which took two years.

ISH is a dedicated group within Cooper Standard that serves the power sports, marine, agriculture, construction, commercial vehicle and recreation vehicle markets.

Based in Novi, Mich., Cooper Standard is a leading automotive supplier with four core product focuses—rubber and plastic sealing, fuel and brake lines, fluid transfer hoses, and anti-vibration systems with 30,000 employees in 20 countries.

by admin admin No Comments

About Closed Cell Sponge Rubber

Closed cell sponge (or foam) is one of the two major categories of sponge material (the other category is open cell sponge). Closed cell sponge is a type of expanded rubber. Closed cell sponge is created when the bubbles produced during the manufacturing process are completely encompassed within the liquid raw material used to make the sponge. When the liquid sets, the gases are entirely encapsulated within each individual bubble, creating a solid yet lightweight structure.

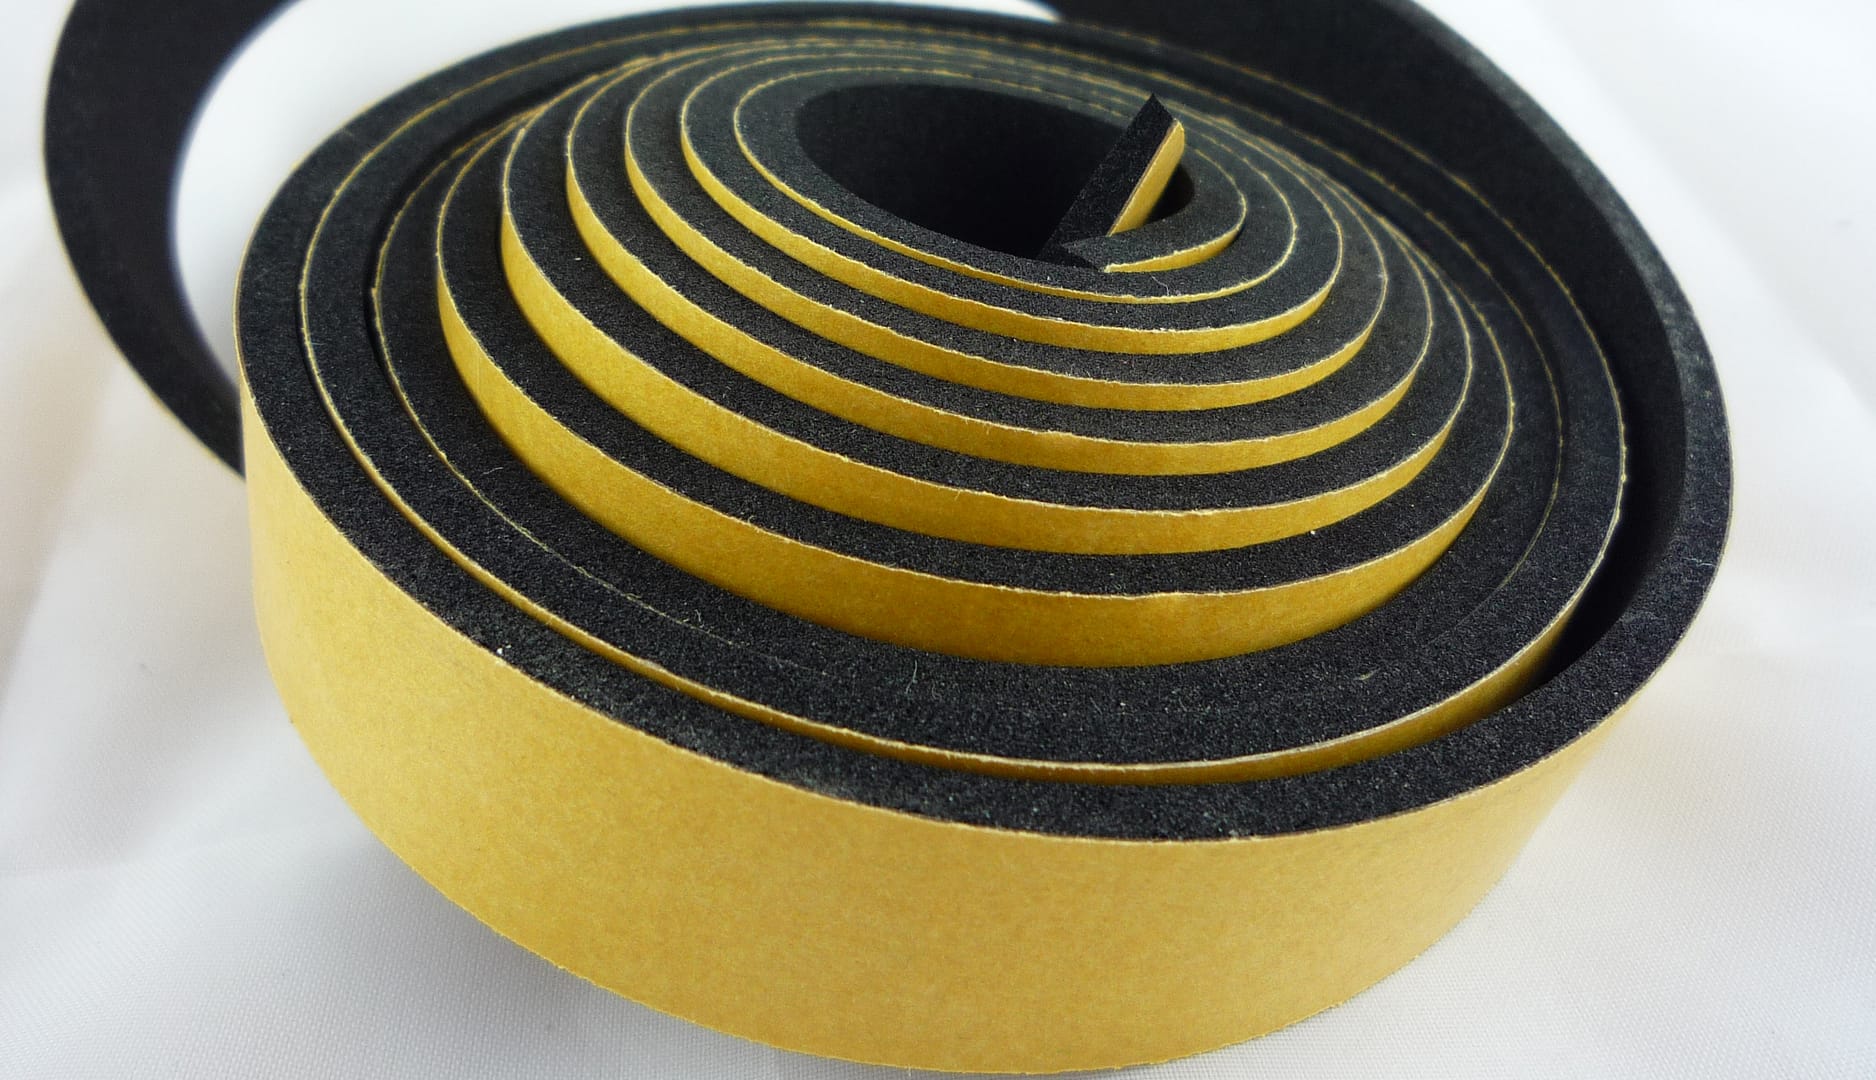
Closed cell sponge is an extremely versatile material from which a variety of products can be fashioned. Because it is particularly good at keeping out moisture and water, closed cell sponge is very effective in applications where a watertight seal is required.

Closed-cell sponge does not have interconnected pores. As a result, closed cell sponge has a higher compressive strength than open cell sponge due to its structure. Closed cell sponge also possesses a higher dimensional stability, low moisture absorption coefficient, and higher strength compared to open cell sponge.

Neoprene Sealing Tape

Closed Cell Sponge Applications and Products

At Hebei Shida Seal Group we make a wide range of products from closed cell sponge which service a diverse range of applications and uses. These include parts for automotive vehicle applications and general industrial use. Examples of products and parts that we have produced from closed cell sponge include: isolators, dual extrusions and weather stripping.

Closed cell sponge is an appropriate material to consider for any of the following types of applications:

  • Thermal insulation
  • Seals and gaskets which protect against the intrusion of moisture, UV light, or dirt
  • Joint fillers and edge extrusions
  • Packaging

Types of closed cell sponge material which we stock includes the following:

  • Closed cell neoprene sponge rubber
  • Closed cell EPDM sponge rubber
  • Closed cell PVC/NBR sponge rubber
  • Closed cell urethane sponge rubber
  • Closed cell silicone sponge rubber

For further information on any of our closed cell sponge rubber products we can manufacture, contact our sales department at [email protected].

by admin admin No Comments

Rubber Molded Parts

rubber molded parts

Rubber bellow for hatchback
Rubber cylinder
micro rubber gaiter
Turn-up Bladder for tyre production
Breathing mask
Silicon grommet for auxillary heating
Knob sleeves for carpentry machines
Seals for gear housing
Seals for electronic components
Oil pressure line for motor saws
seals for labelling systems
Grommet
End wall seal for air conditioning
Control device sealing
Seals for printing machines
Slanted grommet for wiring harnesses
Protective housing for measurement device
Closing caps
sealing control value
sensor sealing
Grommet for engine test bench
Rubber bellow for mirror setting
Flat gasket
Grommet for the wiring harnesses
Spray nozzle for sanitary technology
Membrane for medical technology
frame sealing
Hole disc for cleaning machines
Grommet for the electronics industry
block sealing
control sealing
Rubber bellow for blinker lever
Grommet for the wiring harnesses
Covers for dental medicine
Rubber bellow for air conditioning
grommet with diaphragm
Falling protection for crane control
Protective shell for measurement device
Fuel hose for motor saws
Housing seal for plug
hearing aid gasket
Truck-dust discharging value
gasket for auxiliary heating
Damper ring for riddle screens
Silicon protective shell for foodstuff industry
Dust discharging value
Protecting housing for control device
Rubber bellow for car electronics
oval piston seal
Distance piece for dental medicine
Oil suction line for motor saws
Double diaphragm sealing
Rubber buffer for bodywork
Instrument plating for dental medicine
Rubber bellow for electronic technology
Sealed housing for motor vehicle lighting
Protective shell for hand lamp
Rubber bellow for filter technology
Protective housing for electronic measurement device
Auxiliary heating gasket
Suction hose for motor saws
Air chamber as Lordosis support
conpensation sealing
Silicon moulded parts, lids, breathing masks, seals, sealing rings, sealing washers, rubber bellows, moulded hoses, rubber profiles, rubber buffers, catheters, fuel hoses, paste rolls, sleeves, membranes, protective housing, protective caps, silicon membranes, silicon suction cups, special seals, mirror caps, plugs, grommets and closing caps.


by admin admin No Comments

Ethylene Acrylate Rubber (AEM, Vamac® )

Ethylene/Acrylic elastomer (AEM, Vamac®)

Ethylene/ acrylic elastomer is a copolymer of ethylene and methyl acrylate plus a small amount of a curesite monomer containing carboxylic acid groups. AEM is a tough, low-compression-set rubber with excellent resistance to high temperatures, hot mineral oil, fluids and weathering. The low temperature flexibility and mechanic properties are better than ACM, but it is not well resistant to low aniline oil (like ASTM No. 3 oil) and polar solvents. AEM is typically chosen for applications requiring improved performance versus Nitrile rubber, Neoprene or reduced cost versus higher-end elastomers such as HNBR, FKM. It also usually is applied in automotive industry.

General Information
ASTM D 1418 Designation: AEM
ISO/DIN 1629 Designation: AEM
ASTM D2000 / SAE J 200 Codes: EE
Standard Color(s): Black
Hardness Range: 40 to 85 Shore A
Relative Cost: Medium- High

Cure system – Amine-Cured

Standard AEM compounds are Amine based vulcanization system.

Characteristics

  • Excellent weather & ozone resistance
  • Very good heat resistance
  • Low compression set
  • Resistant to most oils, greases (even with aggressive additives)
  • Good low temperature properties

Service Temperatures

Standard Low Temperature: -30°C / -22°F
Standard High Temperature: 150°C / 300°F

Applications

Typical applications for AEM are all kind of static seals, hoses, gaskets in contact with oil as it happens in gear boxes, oil pumps, cam covers or others.

Vamac® is a registered trademark of DuPont Performance Polymers.

by admin admin No Comments

Polyurethane

POLYURETHANE (PU)
(Urethane – Polyurethane – Thermoplastic & Thermoset)

Polyurethane is a unique material that offers the elasticity of rubber combined with the toughness and durability of metal. Because urethane is available in a very broad hardness range (eraser-soft to bowling-ball-hard), it allows the engineer to replace rubber, plastic and metal with the ultimate in abrasion resistance and physical cost. Many applications using this ultra-tough material have cut down-time, maintenance time and cost of parts to a fraction of the previous figures. 

Urethanes have better abrasion and tear resistance than rubbers, while offering higher load bearing capacity. Compared to plastics, Urethanes offer superior impact resistance, while offering excellent wear properties and elastic memory.

Urethanes have replaced metals in sleeve bearings, wear plates, sprockets, rollers and various other parts, with benefits such as weight reduction, noise abatement and wear improvements being realized.

Applications:

  • Belts
  • Metal forming pads
  • Wear strips
  • Bumpers
  • Gears
  • Bellows
  • Machinery mounts
  • Cutting Surfaces
  • Sound-dampening pads
  • Chute and hopper liners
  • Prototype machined parts
  • Gaskets
  • Seals
  • Rollers
  • Roller covers
  • Sandblast curtains
  • Diaphragms
by admin admin No Comments

Hutchinson launches seventh components plant in Poland

PARIS—French-owned automotive parts maker Hutchinson is set to launch full production at its seventh plant in Poland by the end of this year.

The group’s latest facility, constructed at Zawada, near Debica in south western Poland, will produce Hutchinson’s car body seal systems for customers including the PSA Group and Volvo Cars.

This 226,000-sq.-ft. production and warehouse unit, constructed in just six months, is at the heart of the firm’s newest expansion project worth about $44 million.

Inauguration of the facility on July 19 was symbolic as it was not immediately operating, though component-assembly was expected to begin within days, Piotr Gaska head of Hutchinson’s European body sealing system division said at the ceremony.

Gaska stressed that the unit was intended to ease production pressure on the company’s existing Polish sealing systems and transmission belts plant at Lodz.

The Zawada plant will be equipped with three extrusion lines by the year-end and is set to employ an initial workforce of 240 by then. The employee total eventually will increase to 700, according to the company, part of the Total energy group.

Hutchinson Poland’s original plant was a 151,000-sq.-ft. unit making fluid transmission fuel lines, established in the south central town of Zywiec in 1997. A second plant to produce water pipes for vehicle cooling liquids and ventilation and heating systems opened there in 2000.

The first Lodz facility was launched with an area of almost 193,750 sqaure feet in 2003, while Hutchinson went on to add a second unit of 215,000 square feet there in 2007 making precision and aerial seals and antivibration systems.

A fifth production unit appeared at Bielsko-Bialain 2005 serving the automotive air conditioning and power steering systems segment. Hutchinson built its sixth unit in the country at Zywiec last year to turn out rubber compound used by the other plants.

During the recent launch, Hutchinson group CEO Jacques Maigne pointed out that Poland is the group’s “number one” location in terms of production and employment. “In 2018, we plan to exceed the level of employment to over 10,000 employees in Poland,” he said.

Last year, the group, which has an international workforce of 45,000 in 25 countries around the world, reported annual sales of more than $4.7 billion.

by admin admin No Comments

Physical Properties of Rubber – Second Part

Second Part covers Tear Resistance, Ozone Resistance, Low Temperature Resistance.

Tear Resistance

The tearing of rubber is a mechanical rupture process started where forces are concentrated in an area usually caused by a cut, defect or deformation. 

How to Test Tear Resistance

Tear resistance is tested on a tensometer in the same manner as the tensile strength test except the specimen is one of 5 specific shapes: Type A, B, C, T or CP. A graph is produced in the same manner as the stress-strain curve except the Tear Strength graph is force over jaw separation length. Tear strength is calculated by taking the maximum force divided by the median thickness of the specimen (Ts = F/d).
Type A – Crescent shaped specimen with a nick or cut
Type B – Tab End specimen with a nick or cut
Type C – Right Angle specimen with a nick or cut
Type T (Trouser)– Molded block, 150 X 15 X 2mm, with a 40mm cut
Type CP (Constrained path)– Molded specimen 125 X 28.5 X 5.33mm. This is a special molded shape with fabric reinforcement molded in the mid-plane of the sample. The specimen has a narrows groove down the length in the center. 

Ozone Resistance

Ozone (O3), resistance is used to test the relative ability of the rubber compound to resist outdoor weathering or ozone chamber testing. Some applications like door and window trim would be subject to weathering so testing would give an estimation of how the rubber compound will react to weathering. Other sources of ozone exposure include air purifiers and ozone generators used to purify, deodorize, disinfect and kill bacteria in just about everything from air to food. 

How to Test Weathering/Ozone Resistance

ASTM Method D1171 addresses how to test weathering and ozone resistance. In D1171, rectangular cross section samples are wrapped around a wooden mandrel and left in the sun or placed in an ozone chamber. After a period of time either method A or method B is used to grade the samples. In method A no cracking is permitted under 2X magnification and in method B, three samples are checked and graded depending on the severity of cracking and given a quality retention value (expressed as a percentage) derived from Table 1 in ASTM D1171.
 
ASTM Method D1149 is used to test the effects of specific levels of ozone concentration on specimens that are under dynamic or static surface strain conditions. 

Low Temperature Resistance

There are two low temperature tests that are used in testing low temperature properties of elastomers, ASTM D2137, Low Temperature Brittleness, and ASTM D1379, TR-10/TR-70 Temperature Retraction test. Low Temperature Brittleness is the most common low temperature test you will see on a physical properties data sheet. The temperature retraction test is not as common but will give you more accurate continuous operating low temperature results and a better indication of the viscoelastic and crystallization effects at low temperature.

ASTM D2137 – Low Temperature Brittleness 

The Low Temperature Brittleness test is use to determine the lowest temperature at which a rubber specimen will not exhibit fractures or cracks when subject to a specific impact condition. There are two tests methods, A and B. Test Method A is for rubber volcanizates and Test Method B is for rubber coated fabrics. This test is useful for development purposes but may not necessarily indicate the lowest temperature at which the compound will operate. The TR-10/TR-70 Temperature Retraction Test is more effective in determining the lowest temperature at which a compound will continue to operate.

How to Test Low Temperature Brittleness

Specimens are cut from a die and placed into a fixture. The specimens are immersed into a liquid bath at the specified test temperature for a determined length of time. After immersion deliver a single impact to the specimen and note any cracks, fissures or holes visible to the naked eye. Repeat the test at the next highest temperature (usually 10°C increments) until the specimen passes with no cracks, fissures or holes. 

ASTM D1379 – TR-10/TR-70 Temperature Retraction

The TR-10/TR-70 Temperature Retraction test is used to evaluate the crystallization effects and viscoelastic properties of the rubber specimen at low temperature. This test will give you a better indication of compounds lowest temperature at which it will continuously operate. 

How to Test TR-10/TR-70 Temperature Retraction

This test is performed by stretching a die cut specimen in a special fixture to 250% elongation or 50% of the ultimate elongation if 250% can not be obtained. The stretched specimens are immersed in in a liquid at -70°C for 10 minutes freezing the sample to a state of reduced elasticity. Now, after releasing the specimens, slowly raise the temperature of the samples and measure the temperature and length of the specimens at 2 minute intervals. Report the temperature at which the sample retracted 10% (TR10), 30% (TR30), 50% (TR50) and 70% (TR70). 
 
The TR10 value can be used to indicate the low temperature at which it will continuously operate, and it also correlates with the brittle point. The greater the temperature difference between the TR10 and TR70 the greater the tendency of the rubber to crystallize. TR70 also correlates with low-temperature compression set.
 
Understanding the physical properties of rubber will help you determine what properties are important to your application.

by admin admin No Comments

Physical Properties of Rubber – First Part

First part covers Hardness, Ultimate Tensile Strength, Elongation, Tensile Set.

Hardness

Hardness is the measure of how resistant solid material is when a force is applied. There are 3 main type of hardness measurements, scratch, indentation and rebound. We will only be talking about the indentation hardness for elastomers. Indentation hardness is the materials resistance to indentation by an indentor. 
 
Rubber is made in different hardness’ for several reasons. Some sealing surfaces may not be totally smooth. The little voids, pits and scratches allow a pathway for fluid or air to escape through. Softer materials tend to flow better into these voids and imperfections on the sealing surface creating a better seal. On the other hand, harder rubbers will not do this as well but they do resist extrusion cause by high pressures. Also, coefficient of friction is also affected by the hardness of the rubber. Softer rubber has a higher coefficient of friction and harder rubber has a lower coefficient of friction. Coefficient of friction plays a factor when the rubber seal is sealing a part that moves. 

Measuring Hardness

The durometer gauge is used to test the hardness of elastomers. The 3 most common durometer gauges used to measure rubber are Type A, Type M and Type D. Type A is used to test soft rubber materials while Type D is used to test hard rubber and plastic materials. Type M, also for soft materials, was developed to test small specimens, typically O-rings, that do not meet the physical size requirements specified in ASTM D2240. Is is important to know that although each of the hardness scales are graduated from 1-100, these scales are not the same. 90 Shore A is not the same as 90 Shore D or 90 Shore M. A piece of rubber measuring 90 on a Shore A gauge will read around 42-43 on a Shore D gauge. 

Tensile Strength

Ultimate tensile strength, or just tensile strength, is the maximum force a material can withstand without fracturing when stretched. It is the opposite of compressive strength. Have you ever purchased a pair of shoes and they came joined together with a piece of string? Instead of getting a pair of scissors, did you opted to test your physical strength against the tensile strength of the string and try to break it by pulling on it? If the string has a low tensile strength you should be able to pull and break the string easily. You can apply more tensional force than the string can withstand. If it has a high tensile strength it will be much harder to break by pulling. Are you starting to understand what tensile strength is? 
 
Tensile strength is an indication of how strong a compound is. Any time you have an application where you are pulling on the part, tensile strength is important to know. Whether your product is designed to break easily or not at all the tensile strength will let you know how the object will react to the tensional forces. A few rubber products that tensile strength are important would be bungee cords, rubber tie downs, drive belts. Some elastomeric compounds, like Silicone, have a low tensile strength making them unsuitable for a dynamic types of seal because they can fracture easily. 

Measuring Tensile Strength

Tensile strength is measured with a tensometer. A tensometer is special machine that is designed to apply a tensional or compressive force to a specimen, in our case a die cut dumbbell shape, and measure how much force it takes to deform and fracture the specimen. The force is typically displayed on a stress-strain curve that shows how much force was required to stretch the specimen to deformation and ultimately break. 

Elongation

Maximum elongation, with respect to tensile testing, is the measure of how much a specimen stretches before it breaks. Elongation is usually expressed as a percentage. I had an application where a very small O-ring with an inside diameter of .056 inches had to stretch over a rod with a diameter of .170 inches. A Nitrile O-ring worked fine since it’s ultimate elongation was well over 400% and the O-ring was able to withstand the 200% stretch during installation. But when we tried to use a fluorocarbon compound several of the O-rings were breaking during installation. This fluorocarbon compound had an ultimate elongation of 150% and could not withstand being stretched to over 200% during the installation and the o-ring would break. 

Measuring Elongation

Elongation is measured with a ruler or an extensometer. An extensometer is an electronic ruler that is attached to the tensometer and will measure the extension of the specimen while torsional force is being applied. Another way of measuring elongation is with a regular ruler. To measure the elongation with a ruler, make two bench marks 1 inch a part on the specimen. This is the Initial Gage Length (Lo) and then measure the distance between the marks just before the specimen breaks. This is the Final Gage Length ( Lx). Calculate the elongation with the following equation: elongation % = 100( Lx – Lo ) / Lo. 

Tensile Set

While we are using bench marks, let quickly talk about Tensile Set. Tensile Set is the extension remaining after a specimen has been stretched and allowed to relax for a predefined period of time. Tensile Set is expressed as a percentage of the original length. Tensile set results are not found on the stress-strain curve. It’s a measurement that can be performed after the tensile strength test. Do not mistake Tensile Set with Elasticity. Elasticity is the mechanical property of a material to return to its original shape where Tensile Set is the amount on extension remaining after being stretched. 
 
A rubber band would have a low Tensile Set percentage. After stretched it relaxes close to, if not exactly to, its original length. Now take a piece of Teflon and stretch it. It does not return to its original length and it stays in its stretched state. This would have a high Tensile Set percentage. 
 
One test we perform in our Q.C. inspection is to pull on the O-ring and see how fast and how close it returns to its original diameter. The O-ring should fairly quickly return close to its original diameter. Often times a seal has to be stretched during installation and the last thing you want to happen is the O-ring stay stretched and not fit which could cause problems during assembly.

Measuring Tensile Set

Remember the 2 bench marks 1 inch apart on the specimen in the elongation test? To determine Tensile Set after break, wait 10 minutes after the specimen breaks and then fit the two halves of the specimen back together so there is good contact along the full length of the break. Measure the distance between the bench marks. Use the same equation used in the elongation test except the Final Gage Length (Lx) is the final measured distance between the bench marks. Another way to test without breaking is to stretch the specimen to a specified elongation and hold for 10 minutes. Release the specimen as quickly as possible, making sure not to allow it to snap back, and let sit for 10 minutes. Measure the distance between the bench marks. Again, use the same equation used in the elongation test except the Final Gage Length (Lx) is the final measured distance between the bench marks.

Compression Set

The purpose of the compression set test is to measure the ability of the rubber specimen to retain its elastic properties after compressive forces have been applied for a prolonged period of time at elevated temperatures. 
 
Compression set results can be useful to know when rubber seals, mounts or dampeners are subject to compressive forces in the application. This is particularly important when the seal is in a prolonged compressed state and even more so when simultaneously being exposed to elevated temperatures. When an O-ring is squeezed the rubber has elasticity. It wants to go back to its original shape. This elasticity is how the O-rings seals, especially under low or no pressure. When pressure is applied to the system the O-ring seal pushes against the groove wall opposite the direction of the pressure, forcing it to expand perpendicular to the direction it is being squeezed. This expansion provides additional sealing capability. 
 
When an O-ring is squeezed and subjected to excessive heat it can loose some or all of its elasticity and take a permanent set. Then, when you pull the o-ring out it no longer has a nice round cross section but instead has flat spots were it was squeezed in the application. This permanent set will reduce the sealing ability of the O-ring. The compression set test is a great way to see how the compound will react to compressive forces while subjected to heat. Also, poor compression set along with poor tensile strength can be an indication of the state of cure of the specimen. If you don’t cure the compound enough these properties will diminish.

How to Test Compression Set

The specimen, usually a molded rubber disk, is squeezed between two metal plates to about 75% of its original thickness and then placed in an oven at elevated temperatures for a period of time. After the specimen comes out of the oven and is allowed to cool, measurements can be taken and the percentage of original deflection is calculated. 
 
The original deflection is the amount you compressed the specimen in the fixture. If you have a 1 inch thick specimen and compress it to 0.750” thickness, the original deflection is 0.250”. Now lets say the 1 inch thick sample measured 0.875” thick after the test. It took a 0.125” set. 0.125 is 50% of the original deflection of 0.250” or a compression set of 50%. The higher the percentage the poorer the results. 
 
You may see “Method A” or “Method B”. Method A is compression set under a constant force and Method B is compression set under constant deflection. Method B is the primary method used throughout the ASTM D2000 specification. 

Compression-Deflection

The purpose of the compression-deflection test is to compare the stiffness of the rubber materials under a compressive force. This test can tell you how much a part will deflect under a given load or, alternatively, how much load it will take to deflect a part a given distance. Rubber mounts and dampeners are some examples of parts that are subject to compressive forces and knowing the relationship between compressive forces and deflection can be important.

How to Test Compression-Deflection

Compression-Deflection is measured on a compression testing machine or can be measured on any other type of machine that can apply a measurable force to a specimen at a given rate and be able to measure the deflection to one thousandths of an inch. At Hebei Shida Seal Group, our tensometer can apply compressive force at the specified rate and also measure the deflection. The test is performed by compressing the specimen to a specified compressive force and measuring the deflection results or compressing to a specified deflection and measuring the compression force results.